1. Sign into your admin account and go to Admin in the dark blue section to the right hand side then click on Free Lessons.
2. To create a new free banner click on New.

3. In the next page that loads - enter the name of the freebie (the customer will see this as the banner title).
4. Type in a description of the freebie (the customer will see this in the body of the banner).
5. Choose to make this active (this can be left until last or when your ready to make this available to users).
6. Choose if this will show for Australia or NZ or Both markets.
7. Tick the boxes to make this available for Primary and/or Secondary Schools (please note secondary schools includes area schools).
8. Copy the plan ID (see point 12 for instructions on how to retrieve the plan ID).
9. Click save to create the banner.
10. When you click save you will have the option to upload a banner image. Click upload to select a file from your computer then click upload (you will see the image appear).


11. Click save to leave the page and update any changes.
12. To retrieve the plan ID - go into the unit plan in the ER Template School that you would like users to download. In the URL you should see the below.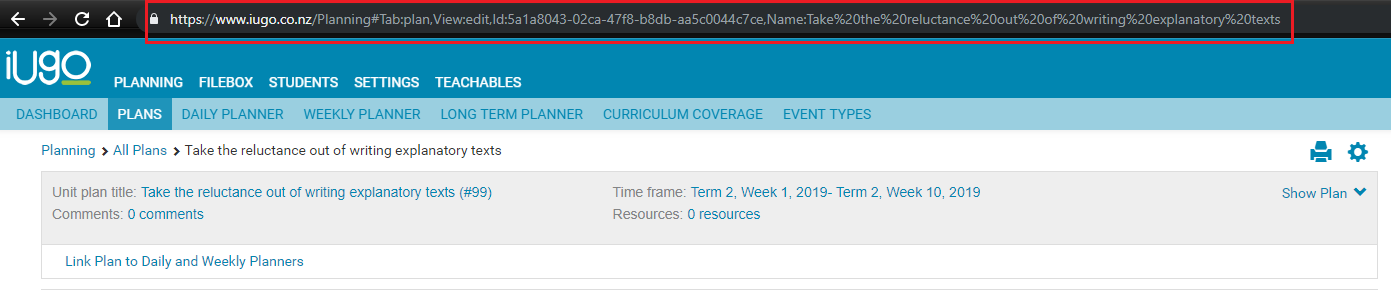
You will need to copy the highlighted section below which is the plan ID number into the freebie banner plan ID. Please note each plan will have a unique plan ID #.